 |  |  |  |  |  |
|---|---|---|---|---|---|
 |  |  |  |  |  |
 |  |  |  |  |  |
 |  |  |  |  |  |
 |  |  |  |  |  |
 |  |  |  |  |  |
 |  |  |  |  |  |
Click on a picture in the gallery above to see a full resolution image, or to navigate manually
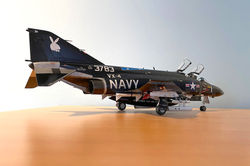
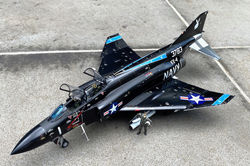
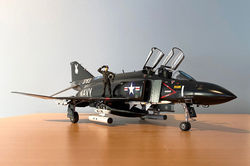
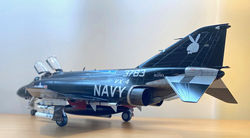
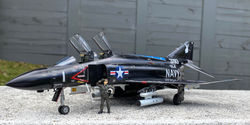
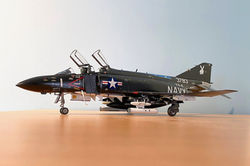
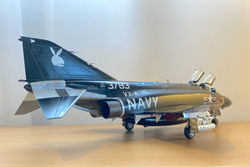
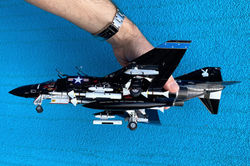
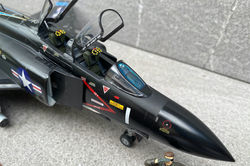
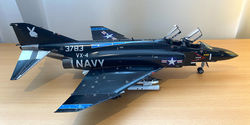
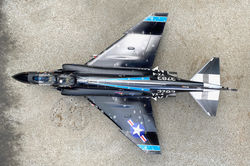
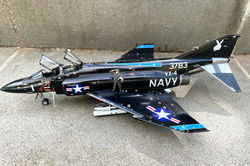
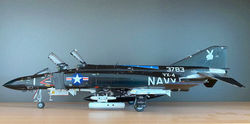
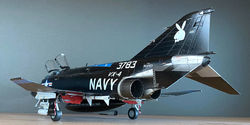
McDonnell Douglas F-4J Phantom II
Vandy 1/ "Black Bunny"
VX-4 The Evaluators
NAS Point Mugu, 1972
Decals by Furball Aero-Design
Why this plane?
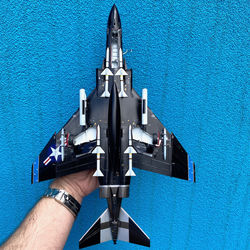
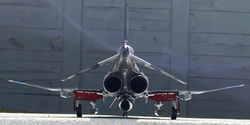
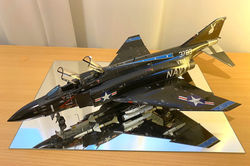
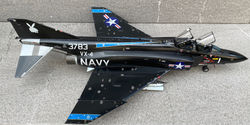
It can be rightfully argued that no model airplane collection is complete without a Phantom. But with so many extraordinary Phantom models out there, how can a "developing" modeller aspire to do something with a potential to stand out a bit? To me, the answer was to try to recreate an unusual paint scheme. My choice fell on the first of the "Black Bunnies" (BuNo 153783) flown by VX-4.
What was added
-
The kit had everything you need to build a Phantom is out of the box. Not only that, I have accumulated lots of spare weapons, antennas, wheels, exhaust cans, pilot figures, etc. for future use. You can't accuse Academy of being stingy with spare parts.
-
The only aftermarket item was the decal set, provided by Furball and printed by Cartograf. The decals themselves were great: sharply printed, and just sturdy enough to not curl, but still thin enough not to look "raised" against the unforgiving shiny black background. However, I am sorry I can't say the same about the instructions, which had a number of errors that got me, on multiple occasions, trying to read little white letters under a magnifier lens (here are some of the errors I found). Also, as detailed below, the colours of some of the stencils demanded corrections.
-
A few of the most obvious cables, pipes and decals were added to the undercarriage and undercarriage bays, based on photos I got from "walk around" sites (like this and this).
-
LAU-10 launchers for Zuni rockets, which are often seen in photos of Vandy 1 (see here, and here), were scratch built.
Notes and lessons learned
I am unashamedly a budget modeller. Thus, once deciding on the subject, the Academy kit was the natural option - despite some internet sources suggesting that it is an abomination. So, before you can scream "Zoukei-Mura!", let me state clearly that I am happy with this choice. Yes, the riveting is heavy, the panel lines too deep, and the level of detail leaves something to be desired in the undercarriage and cockpit. But none of this bothered me. I softened the heavy riveting and panel lines by sanding, to a level which I was comfortable with, and the detail is sufficient for my enjoyment. In the end, it looks like a Phantom, and I managed to made it look like the Black Bunny, without breaking the bank. In fact, particularly after some traumatic experiences with "vintage kits" (like this one), I was quite happy with the amount of TLC required to make this model satisfactory (to my eyes, at least).
The parts join together pretty well. Maybe not perfectly, but nothing that Vallejo putty and a little bit of sanding can't easily fix. Left: some of the potentially most visible joints on the side, after proper treatment. Note the that the wing root required almost nothing. Right: perhaps the most "difficult" job was to join the front section of the fuselage to the bottom of the wing, without creating a step. But, again, no real drama.
The first Black Bunny was very "shiny", being painted in glossy black. Like all contemporary Phantoms, it was also covered all over with instructional and service stencils, which in this case were mostly white (to be visible against the black background). The pictures I could find online suggest that most modellers tend to represent this plane as it would look fresh out of the paint shop, with very white stencils forming a stark contrast with the glossy black paint. Perhaps this is related to the fact that many of the surviving photos, likely taken during airshows and other public events, suggest a clean "Vandy 1". However, it is important to remember that these were also hard working airframes, running strenuous weapon and electronics evaluation programs that were vital for the success of combat units. Considering this, I tried to imagine how this plane would look like at the end of a few weeks of hard work. This was more difficult than I first imagined. Most of the time in this build was spent trying to find the correct balance between a little bit of wear and tear, and not going overboard with weathering (and thus preserving the good looks provided by the gloss black).
-
One aspect that demanded correction was the colours of some of the stencils. The lettering for all instructional stencils was provided in white decals. In reality, some of the words were yellow (e.g. all CAUTIONs) and some red (e.g. all WARNINGs words). This was circumvented by creating appropriately coloured "filters", by mixing equal proportions of floor polish and Tamiya clear acrylics (X-24 clear yellow, and X-27 clear red). This mix could be applied carefully over the appropriate words to tint them using a fine paintbrush, in most cases requiring multiple layers. This worked well against a dark background.
Photo of Vandy 1, albeit at a different point in time compared to my model. Note the "CAUTION" words in yellow, the slight chipping of paint (particularly around panel lines), and scratches to some of the stencils.
Image credit: https://www.flickr.com/photos/horaburo/29996828372/in/photostream/
Some of the instructional stencils in my model, immediately after application of colour "filters". As explained below, later I also tried make the stencils look a bit more subdued, as I felt this look was unrealistic.
-
Another issue with the decals is that immediately after application the white stencils stood out against the black background a lot more than I felt they should, compared with the contemporary pictures. Maybe this comes from the difficulty in printing decals that could accurately replicate the small size of the lettering. In any case, this resulted in an unrealistic "toy-like" look (as show in the photos above and below). My "solution" was to dry brush X-1 over the stencils until they faded a bit, and looked like they had suffered some weathering. Because at that stage the decals had already been sealed, this could be done safely, if necessary multiple times, with any excess being removed with Zippo lighter fluid.
The decals as they originally appeared before any weathering or colouring. Looks like someone had been walking with dirty shoes all over the wing! I felt this look was unrealistic and tried to tone down the white stencils.
-
It was difficult to reach a reasonable balance between representing a well-cared for plane, and adding some heterogeneity to suggest a real-world object. In the end, this is how it went (for the black surfaces):
-
The whole model was covered in Alclad black base and microfiller, and then painted with Tamiya X-1 enamel;
-
The black surfaces were sealed with SMS Premium Super Clear, and decals were applied;
-
A minimal suggestion of weathering was created by running a lead pencil over the panel lines and riveting (and, when required, removing the excess using wet cotton tips);
-
A second layer of SMS Super Clear was applied;
-
The red and yellow "filters" were applied over the stencils (as described above), where appropriate;
-
X-1 enamel was dry brushed over the stencils and other decals, in what was intended to be a more or less random pattern;
-
Using Zippo fluid (applied with cotton tips), excess X-1 was removed. Steps 6 and 7 were repeated several times until the "right" look was attained. (Note: because the filters used floor polish as the base, once dried they were resistant to being removed by the Zippo fluid).
-
Once everything looked good to my eyes, a third layer of SMS Super Clear;
-
Everything was hand-polished with Alclad micromseh cloths, followed by Tamiya compounds, coarse and fine, and then Meguiar's ScratchX, until a smooth reflective appearance was attained.
-
Everything was masked, except the walkways and anti-reflective coating (in front and around the canopy). These regions were painted with XF-1 (flat black), and sealed with TS-80 Flat Clear (spray).
-
Many of the surviving pictures show "3738" carrying LAU-10 quadruple pods for Zuni unguided rockets, which were not available form the kit. I decided to scratch build a pair, using as reference the dimensions found in declassified U.S. Navy manual NAVWEPS OP 2210. The LSU-10 has a fairly simple geometry, so essentially I had to go around the house and find cylindrical objects about 7.4 mm in diameter - which happened to be felt pens - and cut them to be 5 cm long. After that it was just a matter of painting, and putting some decals from the spare box, to match the pictures. The correct braces were provided in the kit.
A few pictures of Vandy 1 carrying the LAU-10 pods, and my steps in scratch building them.
Click on a picture in the gallery above to see a full resolution image, or to navigate manually


Image credit: https://www.flickr.com/photos/horaburo/30111048715/in/photostream/

It started with finding a pen with the correct diameter. Tamyia tape marks the correct length.

Vandy 1 carrying LAU-10 Zuni pods. Image credit: https://www.flickr.com/photos/horaburo/29996839362/in/photostream/

Image credit: https://www.flickr.com/photos/horaburo/30111048715/in/photostream/

Construction steps

Construction of the F-4J Phantom II using the Academy 1/48 kit

Construction of the F-4J Phantom II using the Academy 1/48 kit

Construction of the F-4J Phantom II using the Academy 1/48 kit

Construction of the F-4J Phantom II using the Academy 1/48 kit
Click on a picture in the gallery above to see a full resolution image, or to navigate manually
-
Once the cockpit is built (see below), the first job is to join the top and bottom halves of the wings. This requires installing the main undercarriage spurs and painting the interior. I used SMS insignia white here.
-
Next the fuselage is joined to the wings. Note the nice joining (no putty needed). The jet intake ducts are added (again, after painting), as well as the boundary layer splitter plates. All interior white surfaces have to be masked thoroughly at this stage, to avoid unintentional spraying of the black paint that is coming soon. Removing these tapes later proved a bit of a pain.
-
Jet intakes added. Again, the interior needs to be painted before this, and masked. This step required a bit of effort to create smooth transitions, including some filling and sanding.
-
A view of the back of the fuselage at the same stage. Note the almost perfect match of the top and bottom parts, which only required gentle sanding. The afterburner "cans" are only dry fitted at this stage.
-
After completing the assembly of the wings, and adding the nose cone and the heat-resistant titanium shielded parts at the back, it starts looking like a Phantom. Creating a smooth transition for the nose cone required some sanding. In preparation for painting, I have positioned the canopy parts using only a few spots of white glue, to allow masking and protecting the cockpit. The canopy was later removed, and painted separately, right at the end. The titanium parts were painted, and then masked.
-
Also in preparation for the black paint, the wheel bays were masked. I used Mr. Masker Neo.
-
Following the application of the primer (Alclad black base and microfiller).
-
Another view following the primer layer. It looks quite sinister at this stage.
-
And then, some Tamiya X-1 (enamel), followed by a layer of clear coat (SMS super clear).
-
Following removal of the masking, the titanium blast shield was slightly weathered using various metallic colour pencils. I kept doing this throughout the build, adding a bit after each layer of clear coat.
-
The stabilators were painted separately, and added at this stage. And then the decals, followed by more clear coat. As mentioned above, I was unhappy with the look at this stage, with the white and yellow stencils being too obvious in comparison with my reference pictures. They were subsequently toned down as described above, with multiple cycles of application of dry-brushed X-1.
-
The undercarriage was added. Not shown here, at this stage I also added the ventral airbrake panels.
-
For the signature shiny black look, the entire airframe was hand-polished with Alclad micromesh polishing cloths, followed by Tamiya polishing compound coarse and fine, and finally Meguiar's ScratchX.

Parts used to build the Academy F-4J cockpit, minus the ejection seats

The assembled Academy F-4J cockpit, dorsal view from behind

Academy F-4J, cockpit viewed from the outside

Parts used to build the Academy F-4J cockpit, minus the ejection seats
Click on a picture in the gallery above to see a full resolution image, or to navigate manually
The cockpit
As usual, I include here images that give an idea of what type of cockpit detail you getout "of the box". I have not added any aftermarket, but consulted various "walk around" web sites to get a better idea of what colours to use for the different instrument panels.
The cockpit is mounted on top of the front undercarriage bay (built from parts F47-F51 in the first photo). Fitting the bay and assembled cockpit to the fuselage without leaving gaps is a fiddly job.
One thing to remember here is that, if you want to have pilot and RIO figures in the cockpit, you have to fit them before the fuselage is closed - as the instructions tell you to do. I thought it would be possible to do it later, but in practice this just could not happen. Fortunately the kit also provides aviator figures to be placed outside (I have included one in some of my photos)